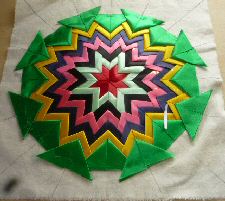
Somerset Star
|
|
|
|
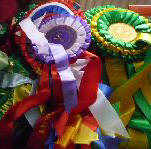
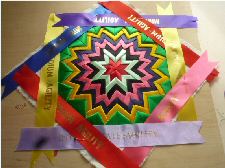
What can you do with old rosettes?
|
|
What you need:-
|
|
 To
make the star you need:-
To
make the star you need:-
- 4 pieces x 3 inches long of one colour
- 8 pieces x 3 inches long of one colour. You will need two sets of these.
- 16 pieces x 3 inches long of one colour. You will need four sets of these.
Accurate measuring is the key to making a really good job of this.
| !. First sort your rosettes. I find
that UKA ones are a good quality for this but they don't have the colour range you get at
say BAA shows. Kennel club show rosettes have a greater variety of widths of ribbons
which make some of them difficult to use. Do take into account the colours you use. I
think these are more effective with high contrast colours. I lay my ribbons out and move
them around until I have a colour range that I like.
The width ribbon I use for these is 1½ inch. Ribbon is still made in Imperial widths. |
 |
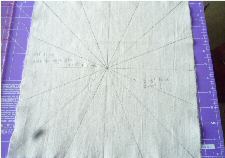
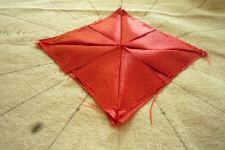
| 2. Take your backing fabric and cut it
exactly to a 12 inches square. Now get a ruler and rule a line from corner to corner both
ways. Where they cross is the centre of your star. Fold the square in half, mark the
middle of the sides, then rule a line across the square through the middle again until
you have eight lines.
This will be enough, but for accuracy I ruled more lines, using a protractor to get them right. |
 |
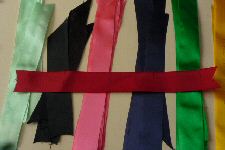
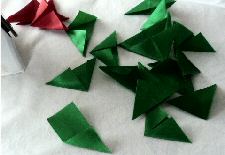
| 3. Now you have your backing ready you
must prepare your ribbons. Using no steam press the ribbons carefully. Experiment with
some spare stuff to find the right temperature. Fold one end across to meet the other
side, then fold the other end. They should look like triangles with an open centre line.
Be careful of your fingers doing this! Your ribbon should look like the illustration now. |
 |
| 4. Place the triangular pieces on the
centre of the backing points towards the middle, open side up, line the open centre line
up with the vertical and horizontal lines and pin. Choose the thread nearest in colour to
your ribbon and sew one or two stitches through the points to anchor them down.
These stitches are the only ones that show so take care over them. |
 |
| 5. Next stitch round the outer edge of the triangles. Don't turn the raw edge in or neaten it in any way. This will be covered by the next layer. |
 |
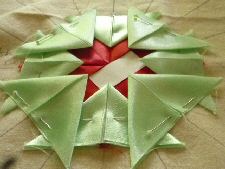
| 6. Now take a set of eight
triangular ribbons and place them on top of the first set, with the point of the triangle
towards the middle and the centre line along the diagonals. You need to make sure that
the distance from the centre is the same for each piece. I used a piece of cardboard cut
¾inches wide to lay on the work.
Stitch down the points as you did before, then tack the edges. 7. Take your second set of 8 triangles and arrange them. this time with the points ½ inches away from the points of the first set. Again make a simple measure out of card to keep this accurate. Stitch the points down and then tack the edges in the same way. |
 |
| 8. Now use your first set of 16. Lay down eight so the points are ½ inches away from the previous set and pin them. Now take the other eight and place them between the others so the points lay at the top of the 'star points.' Pin them and then stitch as above. |
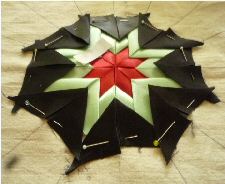 |
| 9. Place the next set of 16 in the same way but all points will be ½ inches from the set before, pin and stitch. Place the next two rounds in the same way. |
 |
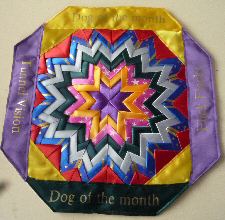
 Once
the star is complete you have to decide how you are going to finish it off. This depends on
your skills. At the simplest level, you could just stick the whole thing onto card and cut the
edges carefully with a craft knife/ Stanley knife. Eventually the edges will fray if it is
handled a lot. You could bind it with bias binding and take out the last set of tacking.
Once
the star is complete you have to decide how you are going to finish it off. This depends on
your skills. At the simplest level, you could just stick the whole thing onto card and cut the
edges carefully with a craft knife/ Stanley knife. Eventually the edges will fray if it is
handled a lot. You could bind it with bias binding and take out the last set of tacking.
I used printed ribbons to make a frame for mine, taking advantage of the fact that ribbon edges won't fray and then I backed it with some appropriate fabric.
Uses
You could use these as table centres or cushion covers or hang them on the wall. I haven't
tested how well these might wash. I don't recollect having rosette colours run in the horrible
weather we sometimes experience at shows. However, these ribbons are likely to lose quality if
they get wet.
If I wasn't so busy I'd make a You-tube film of how to make it! In the meantime, I'm thinking of doing some Log Cabin blocks with ribbons, too.
 About
the author...
About
the author...
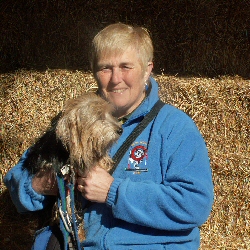
Helen Walland has been around Agility long enough to collect a lot of rosettes for
this project. Since she retired from teaching, she has extended her hobbies to include
contemporary quilting. She is currently taking her City & Guilds Level 3 in Patchwork and
Quilting where she came across this design.
She has three dogs who enjoy agility, Rally, Trick training and sitting on sewing.
First published 5 October 2011
|
[bottom.htm] © Copyright Agilitynet |
 It's
great to win them – after all that's what we're doing agility for – but they do rather
accumulate after a year or two. Lots of us have dusty black bags full in our lofts which we
can't bear to part with.
It's
great to win them – after all that's what we're doing agility for – but they do rather
accumulate after a year or two. Lots of us have dusty black bags full in our lofts which we
can't bear to part with.